Creamy Banana Pudding Cheesecake

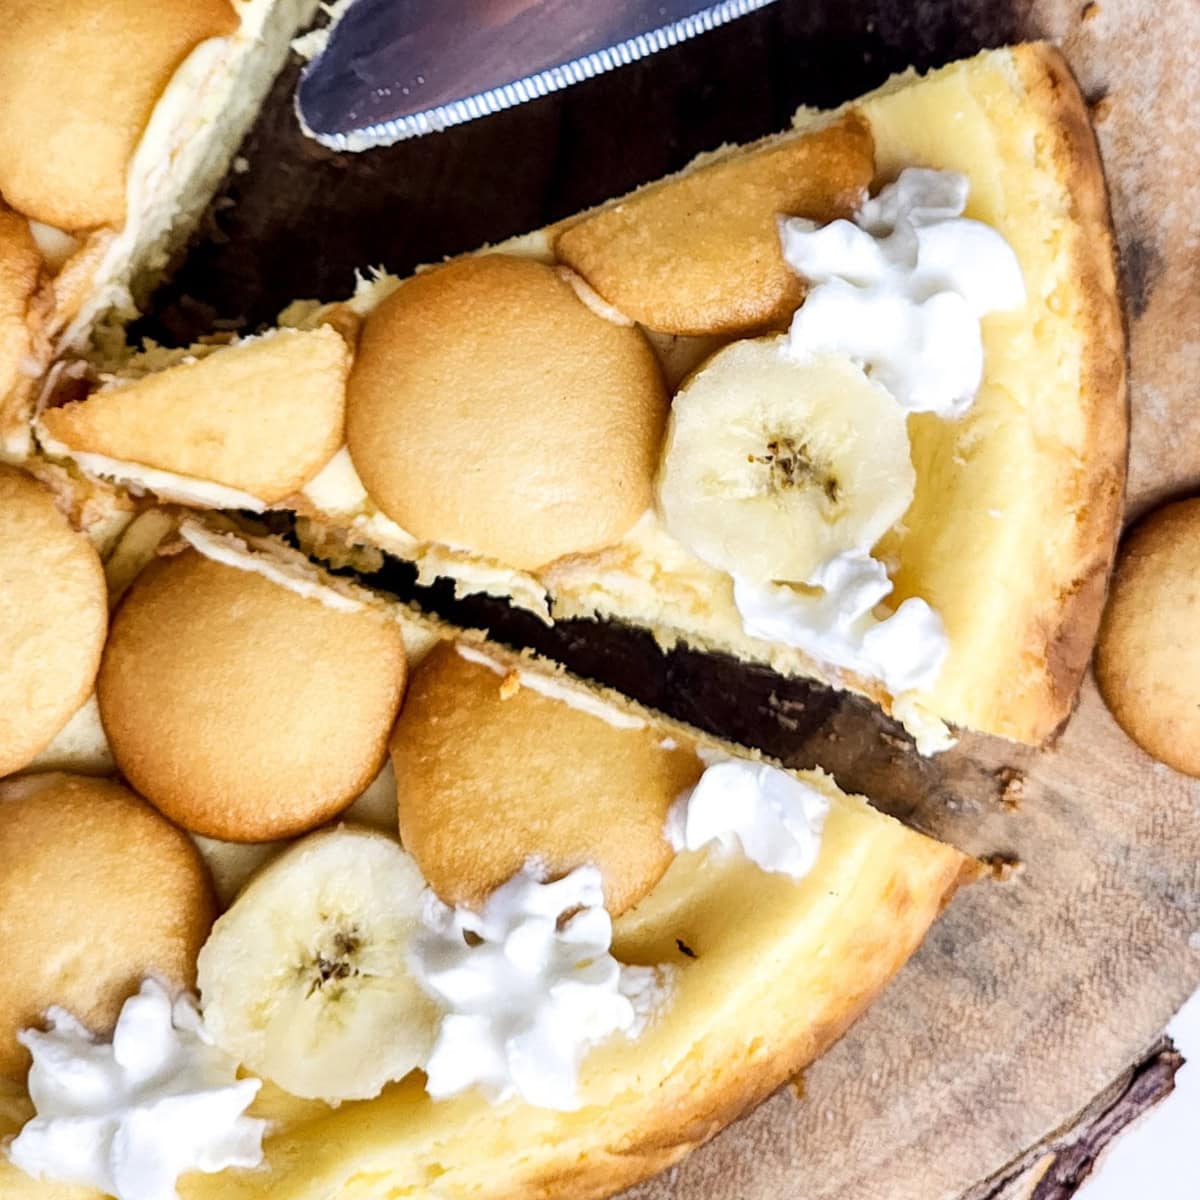
This Banana Pudding Cheesecake is a creamy, crowd-pleasing dessert made with rich cream cheese, banana pudding mix, and a buttery graham cracker crust, then topped with whipped cream, fresh bananas, and vanilla wafers.

WANT TO SAVE THIS FOR LATER?
This is the perfect dessert to serve for holidays, birthdays, potlucks, and Mother’s Day. It’s especially great for spring and summer gatherings.
It pairs perfectly with classic vanilla desserts or easy no-bake treats, so it’s great to serve alongside something like a simple banana dessert or a light whipped-cream-based sweet.
How to Make Banana Pudding Cheesecake
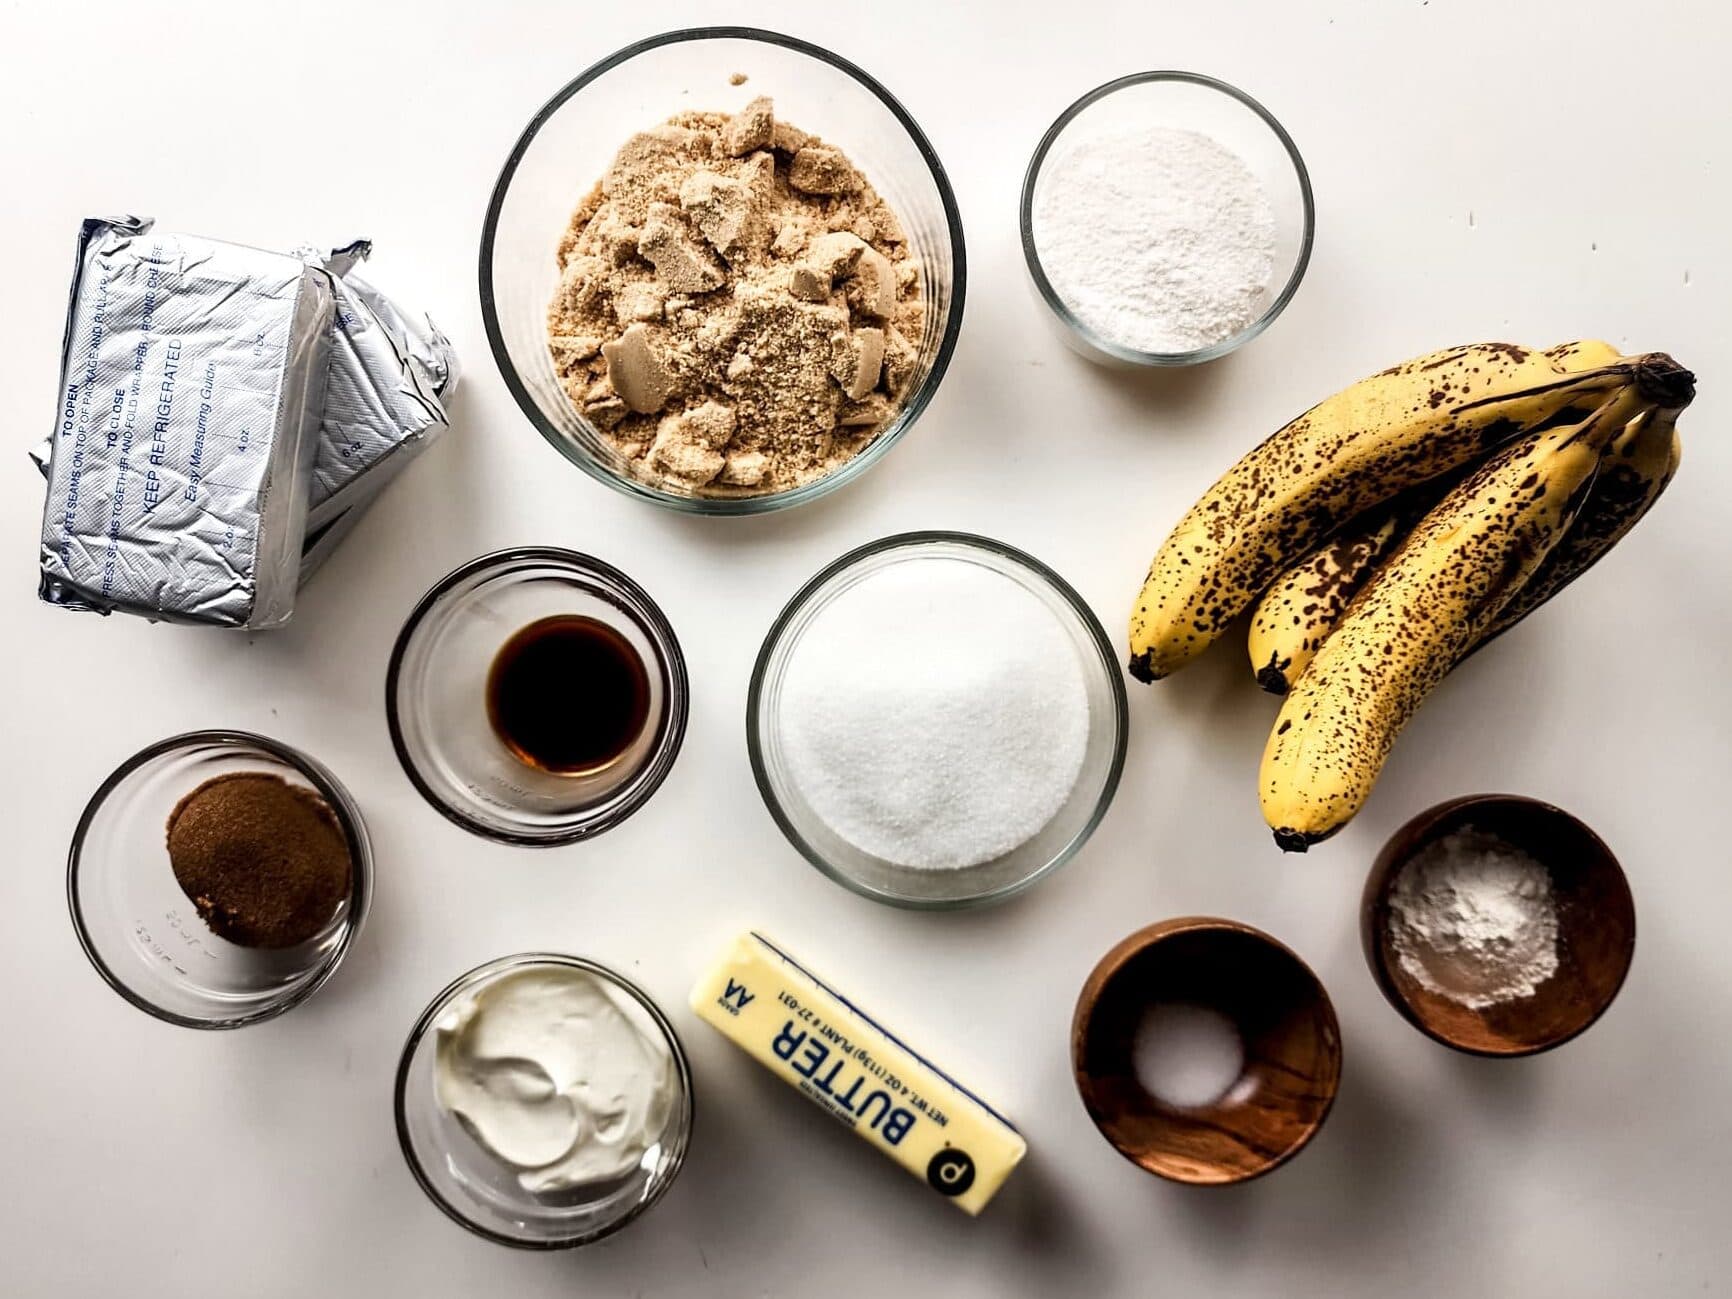
Ingredients you’ll need for the crust
Ingredients you’ll need for the cheesecake
Ingredients you’ll need for the topping
Step-by-Step Guide
1. Start by lining your 9-inch springform pan with parchment paper. Cover both the bottom and sides to ensure easy removal later—no cheesecake casualties here!
2. Use a food processor or blender to turn your graham crackers into fine crumbs.
3. In a mixing bowl, combine these crumbs with brown sugar, then stir in the melted butter until everything is well-coated.


4. Press the mixture into the bottom of your springform pan. Use the flat bottom of a small glass to get it evenly packed. Pop it into the freezer while you tackle the filling.


5. Preheat your oven to 325°F (163°C).
6. In a large mixing bowl, beat the cream cheese with a hand mixer until it’s silky smooth. Add the sugar, salt, flour, and banana pudding mix, blending until combined.

7. Then, one by one, mix in the eggs, ensuring each is fully incorporated before adding the next. On the final egg, also toss in the vanilla extract and sour cream. Blend until the mixture is smooth and dreamy.


8. Retrieve your chilled crust and pour the cheesecake filling into the pan. Smooth the top with a rubber spatula to make it picture-perfect.


9. Bake for 55-60 minutes. The edges should be set while the center remains slightly jiggly—this ensures a creamy texture.
10. When the timer goes off, turn off the oven, crack the door open, and let the cheesecake hang out for another hour. This slow cooling process helps prevent cracks.
11. Once the cheesecake has cooled to room temperature, cover it with plastic wrap and refrigerate for at least 6 hours (or overnight if you’ve got the patience). Trust me, it’s worth the wait.

12. Release the cheesecake from the springform pan and carefully peel away the parchment paper. Now comes the fun part: alternating swirls of whipped cream, slices of fresh banana, and vanilla wafers around the edge. It’s as stunning as it is delicious.

Serve & Enjoy!

Important Recipe Notes
- Room temperature ingredients matter. Make sure your cream cheese, eggs, and sour cream are fully at room temperature so the cheesecake blends smoothly without lumps.
- Don’t overmix the batter. Mix just until everything is combined to keep the cheesecake creamy and prevent cracks.
- Let the cheesecake chill for at least 6 hours (overnight is best) so it sets properly and slices cleanly.
- Add the sliced bananas right before serving to keep them fresh and prevent browning.
- Letting the cheesecake cool gradually in the oven with the door cracked helps avoid cracks on top.
- The cheesecake itself can be made a day in advance—just wait to add the toppings until right before serving.
Banana Pudding Cheesecake

Ingredients
For the Crust
- 2 cups graham crackers, crushed
- ¼ cup brown sugar
- ½ cup unsalted butter, melted
For the Cheesecake
- 24 ounces cream cheese (room temperature for smooth blending)
- 1 cup white granulated sugar
- ½ teaspoon salt
- 1 ½ tablespoons all-purpose flour
- 3.4 ounces banana pudding mix (instant or cook-and-serve both work!)
- 4 large eggs
- 1 tablespoon vanilla extract
- ½ cup sour cream
For the Topping
- Whipped Cream
- Sliced Bananas
- Vanilla Wafers
Instructions
- Start by lining your 9-inch springform pan with parchment paper. Cover both the bottom and sides to ensure easy removal later—no cheesecake casualties here!
- Use a food processor or blender to turn your graham crackers into fine crumbs.
- In a mixing bowl, combine these crumbs with brown sugar, then stir in the melted butter until everything is well-coated.
- Press the mixture into the bottom of your springform pan. Use the flat bottom of a small glass to get it evenly packed. Pop it into the freezer while you tackle the filling.
- Preheat your oven to 325°F (163°C).
- In a large mixing bowl, beat the cream cheese with a hand mixer until it’s silky smooth. Add the sugar, salt, flour, and banana pudding mix, blending until combined.
- Then, one by one, mix in the eggs, ensuring each is fully incorporated before adding the next. On the final egg, also toss in the vanilla extract and sour cream. Blend until the mixture is smooth and dreamy.
- Retrieve your chilled crust and pour the cheesecake filling into the pan. Smooth the top with a rubber spatula to make it picture-perfect.
- Bake for 55-60 minutes. The edges should be set while the center remains slightly jiggly—this ensures a creamy texture.
- When the timer goes off, turn off the oven, crack the door open, and let the cheesecake hang out for another hour. This slow cooling process helps prevent cracks.
- Once the cheesecake has cooled to room temperature, cover it with plastic wrap and refrigerate for at least 6 hours (or overnight if you’ve got the patience). Trust me, it’s worth the wait.
- Release the cheesecake from the springform pan and carefully peel away the parchment paper. Now comes the fun part: alternating swirls of whipped cream, slices of fresh banana, and vanilla wafers around the edge. It’s as stunning as it is delicious.
- Grab a knife, cut yourself a generous slice, and savor every bite.