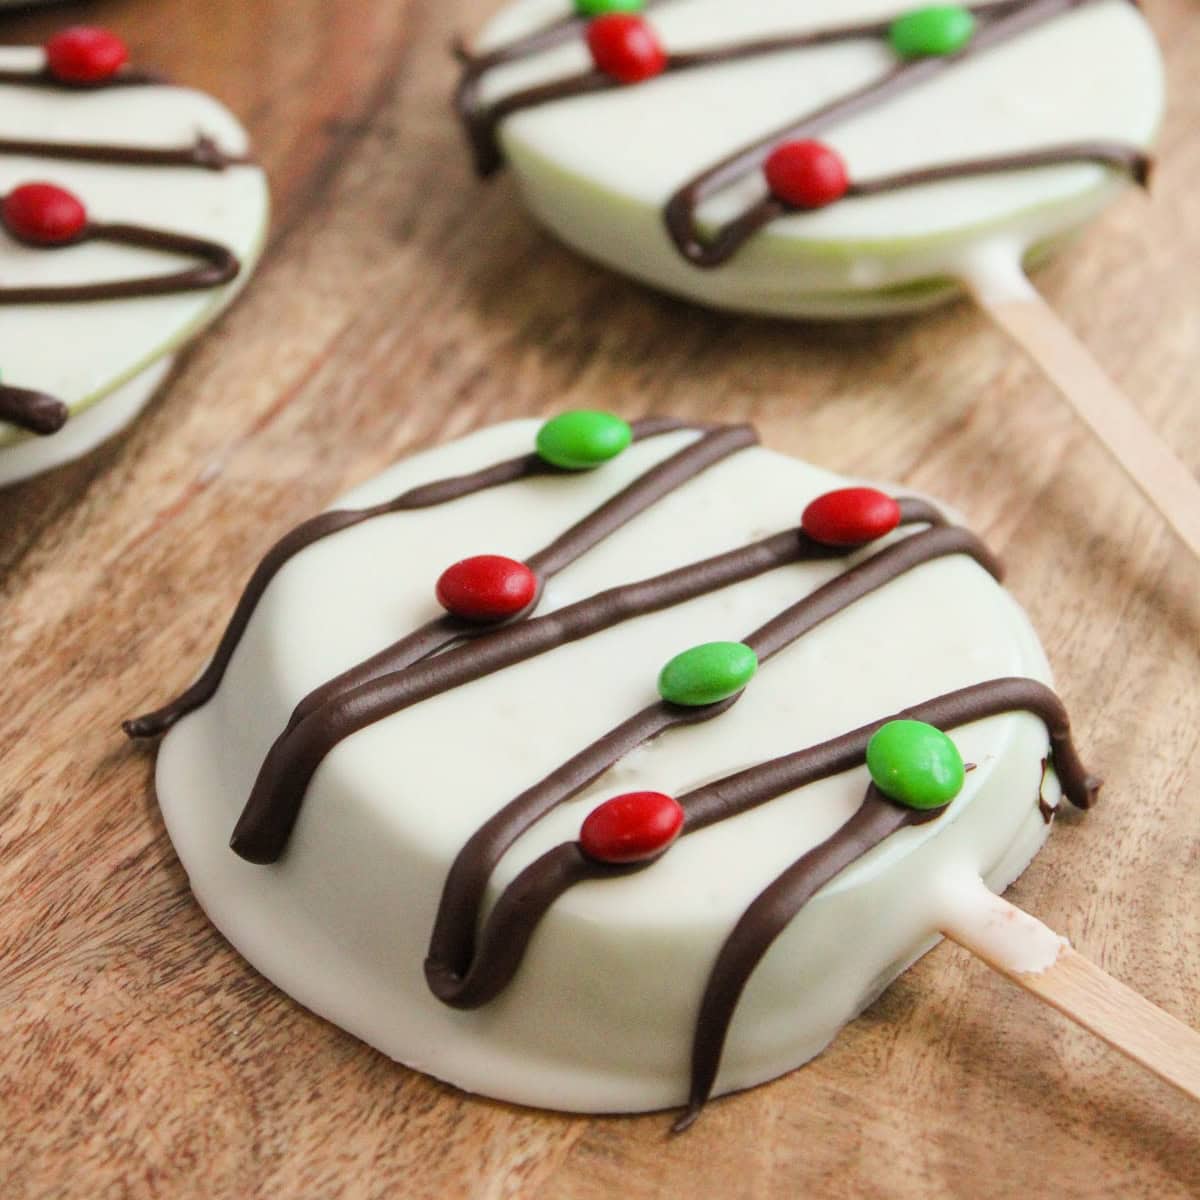
Christmas Light Apple Slices


These Christmas Light Apple Slices are an easy, kid-friendly Christmas treat recipe made with just five ingredients. This recipe is perfect for adding to your holiday baking activities with your kids, ideal for Christmas parties, holiday treats, or even an afternoon snack while decorating the tree.
Tackle 2026 dinners with our gorgeous Ultimate Meal Planner - just $4.50 this week with coupon code MARCH50. Get it here.

WANT TO SAVE THIS FOR LATER?
The idea of turning apple slices into “Christmas lights” came from wanting something interactive—something kids could decorate and be proud of.
If you like this kind of recipe, you may also want to try my Christmas Ornament Oreos and Chocolate-Dipped Santa Oreo Cookies.
How to Make Christmas Light Apple Slices
Ingredients you’ll need for this recipe

Step-by-Step Guide
1. Start by slicing your apples into ¼-inch thick pieces. Remove any seeds as you go and insert a popsicle stick into each slice for easy handling.

2. Lay your apple slices on a large baking sheet lined with parchment paper, so they’re ready for their chocolate coating.
2. In a microwave-safe bowl, heat your white chocolate wafers in 30-second intervals, stirring between each round until smooth and fully melted.

3. Grab an apple slice and dip it into the melted white chocolate, making sure both sides are covered. Let any excess chocolate drip off before placing the slice back on the prepared baking sheet. Repeat this step with all the apple slices and allow the chocolate to harden for about 15 minutes.


4. Once the white chocolate is set. Melt your dark (or semi-sweet) chocolate chips, transfer the melted chocolate to a piping bag, and cut a small tip. Drizzle the dark chocolate in a zigzag pattern over the apple slices.


5. Before the dark chocolate hardens, gently press the mini M&Ms into the chocolate drizzle. Go classic with red and green M&Ms or get creative with a mix of colors for a multicolored light effect!

6. After you’ve added your “lights,” give the chocolate some time to harden completely.
Serve and Enjoy!

Important Recipe Notes
- Use Granny Smith apples because they hold their shape and don’t get soggy.
- Insert sticks before dipping to make them easier to handle, especially for kids.
- Melt white chocolate in short intervals and stir often to prevent burning. The dark chocolate drizzle should be just soft enough to pipe but not too runny.
- Add M&Ms before the chocolate sets: Press them gently while the dark chocolate is still soft so they stick well.
- These apple slices are best eaten the same day. If needed, store in an airtight container in the fridge for up to a day. Avoid covering tightly while the chocolate is still soft, or it may stick.
Christmas Light Apple Slices

Ingredients
- 4 Granny Smith apples
- 14 popsicle sticks
- 10 oz white melting wafers
- 1.08 oz mini M&Ms
- ½ cup dark chocolate chips (or semi-sweet chocolate chips)
Instructions
- Start by slicing your apples into ¼-inch thick pieces. Remove any seeds as you go and insert a popsicle stick into each slice for easy handling.
- Lay your apple slices on a large baking sheet lined with parchment paper, so they’re ready for their chocolate coating.
- In a microwave-safe bowl, heat your white chocolate wafers in 30-second intervals, stirring between each round until smooth and fully melted.
- Grab an apple slice and dip it into the melted white chocolate, making sure both sides are covered. Let any excess chocolate drip off before placing the slice back on the prepared baking sheet. Repeat this step with all the apple slices and allow the chocolate to harden for about 15 minutes.
- Once the white chocolate is set, it’s time to add those cute “Christmas lights.” Melt your dark (or semi-sweet) chocolate chips, transfer the melted chocolate to a piping bag, and cut a small tip. Drizzle the dark chocolate in a zigzag pattern over the apple slices.
- Before the dark chocolate hardens, gently press the mini M&Ms into the chocolate drizzle. Go classic with red and green M&Ms or get creative with a mix of colors for a multicolored light effect!
- After you’ve added your “lights,” give the chocolate some time to harden completely.