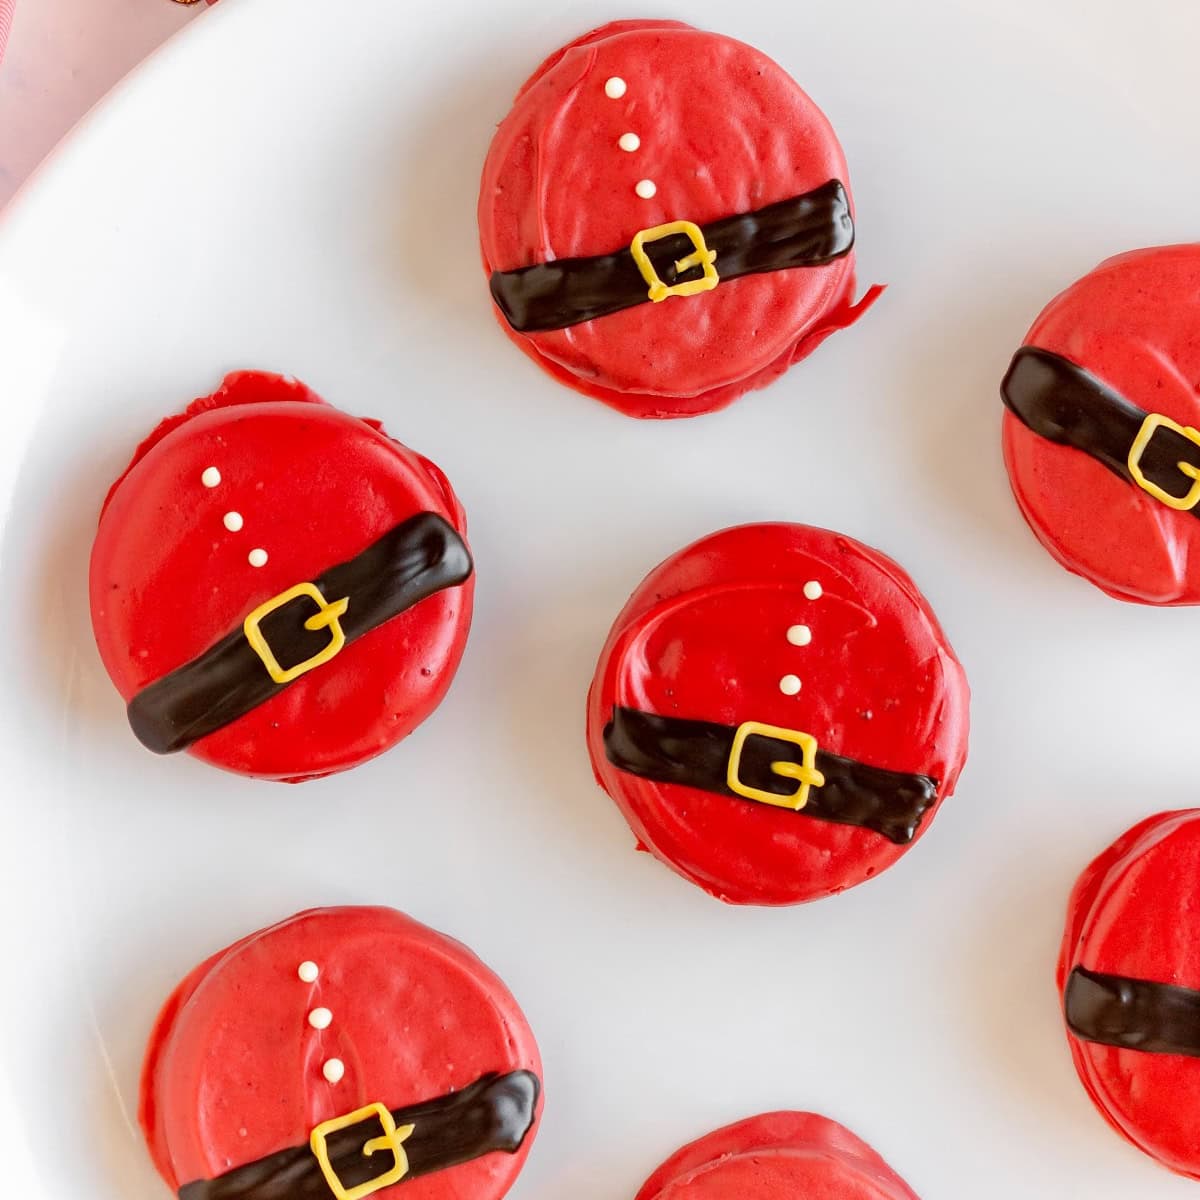
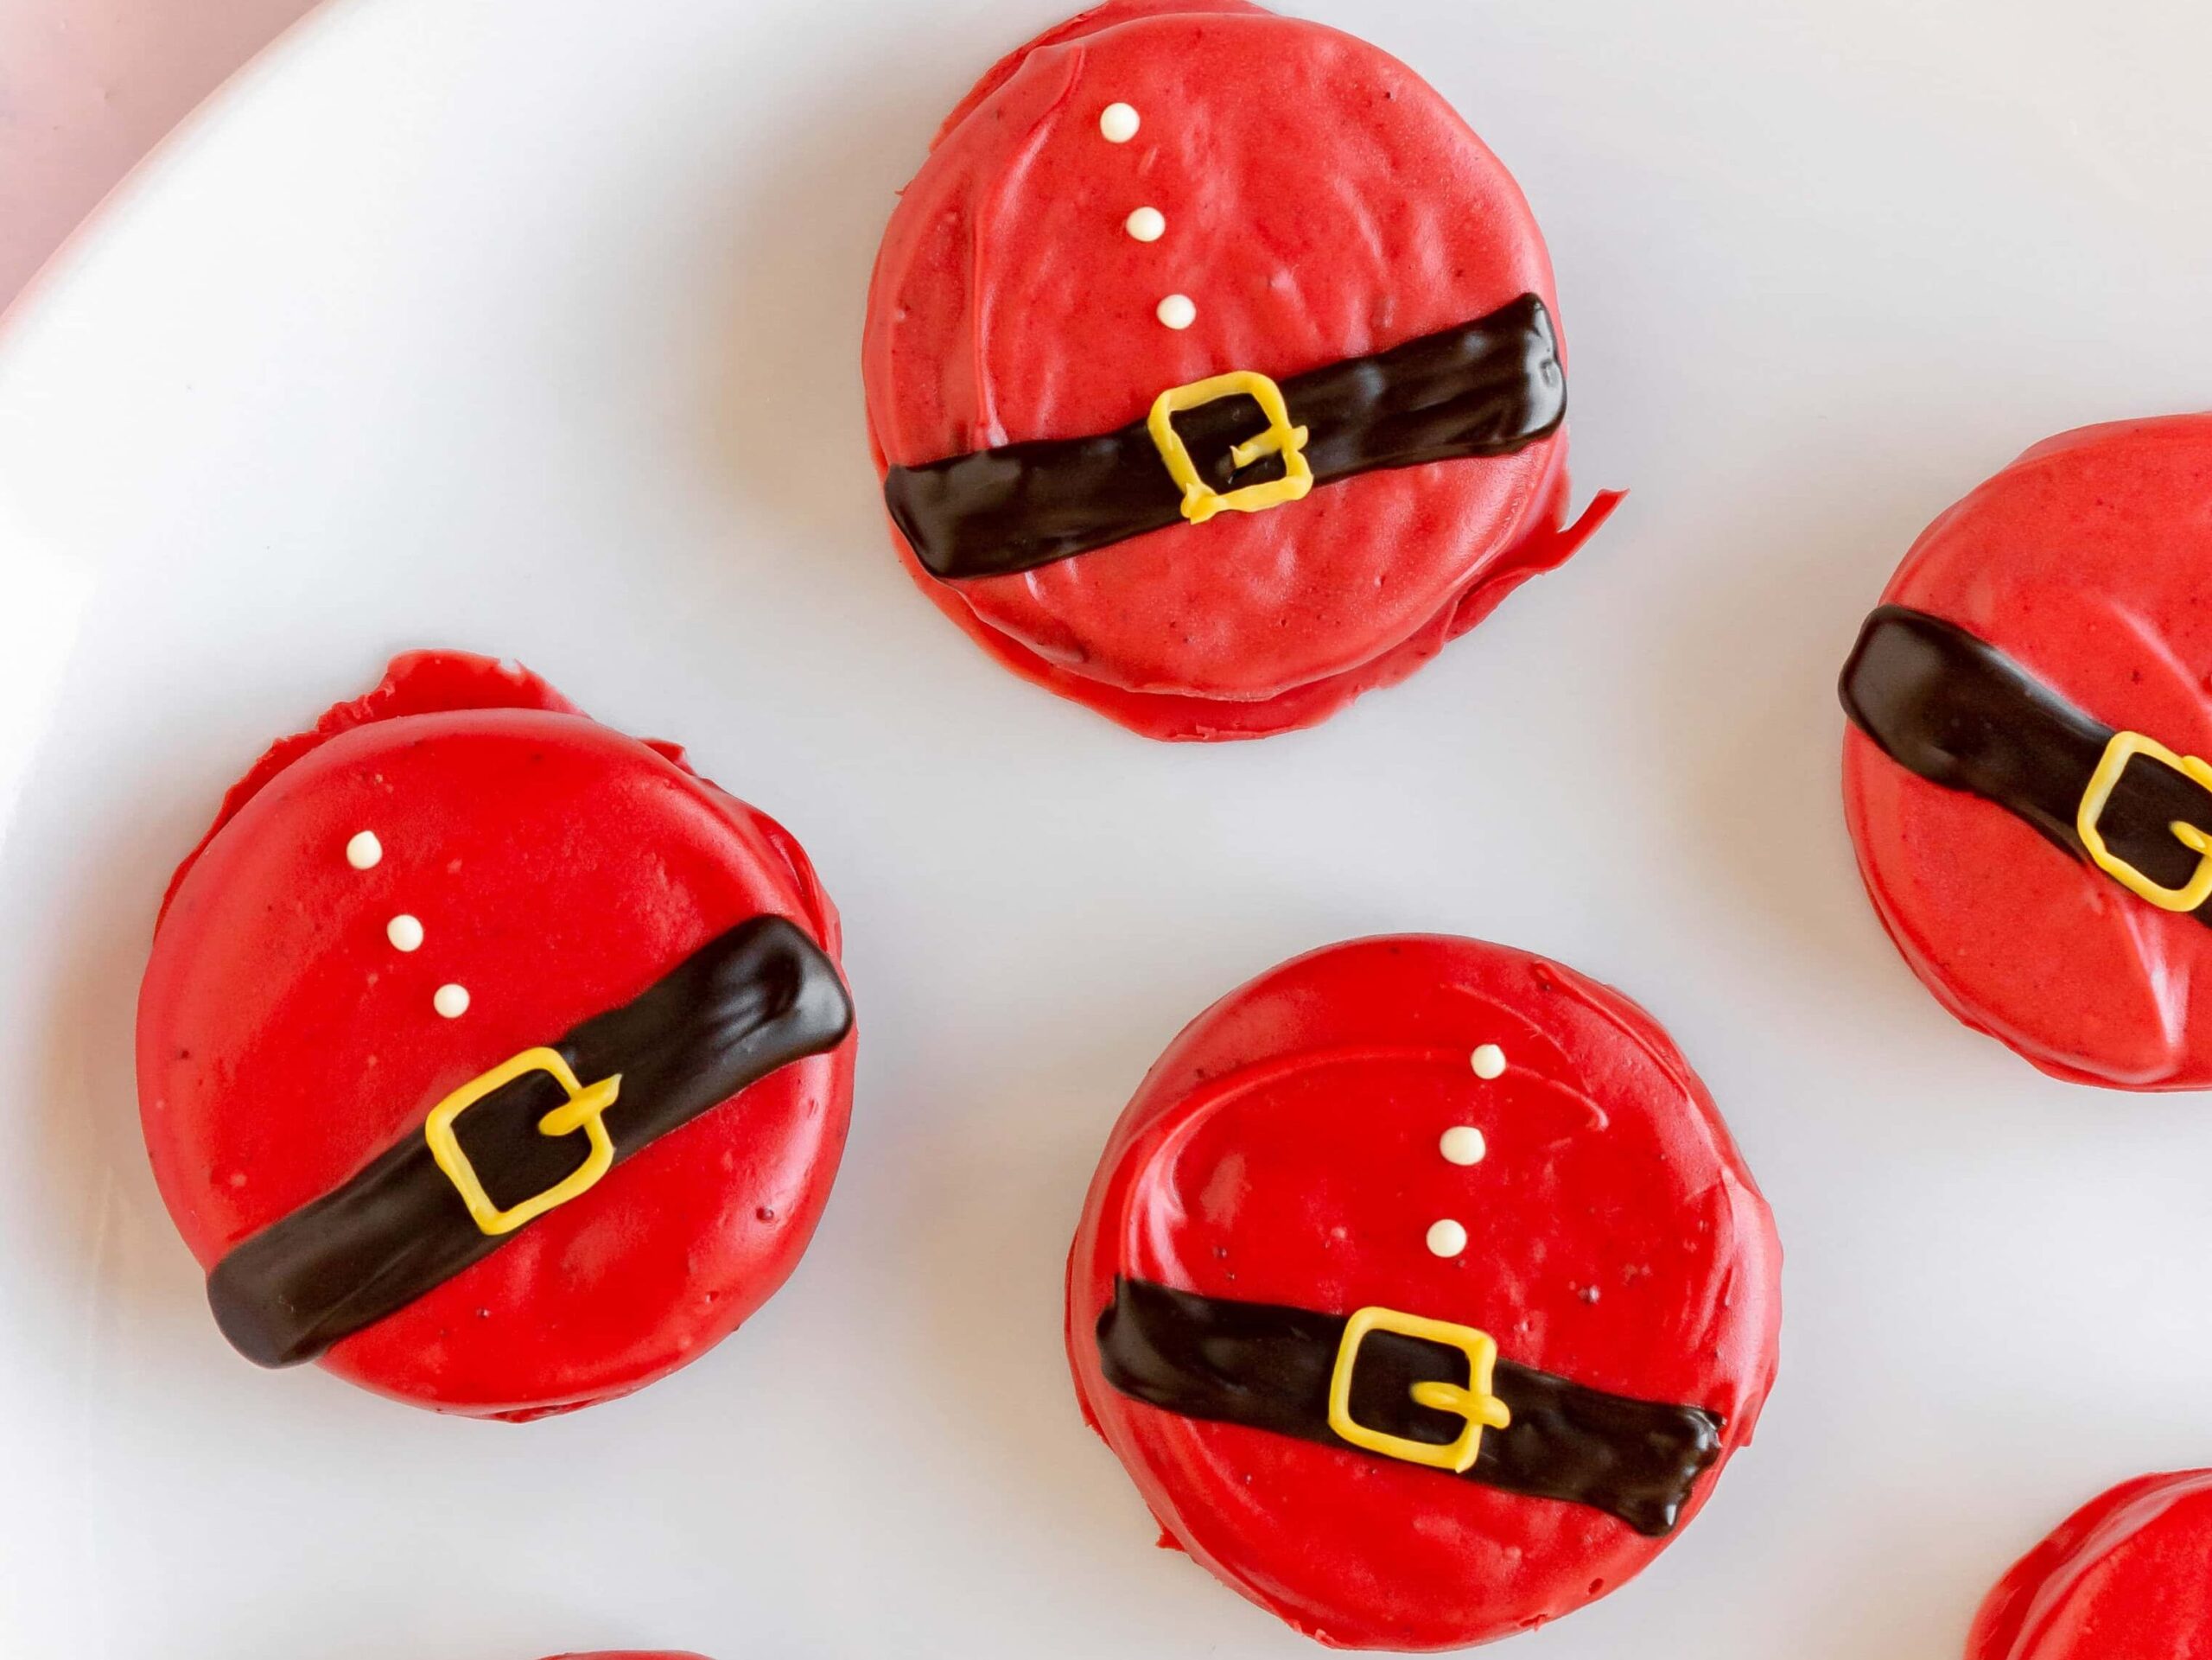
Chocolate-Dipped Santa Oreo Cookies


These Santa Oreo Cookies are an easy no-bake treat made with strawberry Oreos and dipped in red melted chocolate, designed to look like Santa’s suit. It is also an easy holiday baking activity to make with your kids. Ideal for Christmas classroom treats, cookie exchanges, and bake sales.
WANT TO SAVE THIS FOR LATER?
What I love about this Oreo recipe is that it is made with only 3 ingredients. It’s the best option when you are out of time thinking about what Christmas treat to serve at a Christmas party.
Try also my Christmas Ornament Oreos and Reindeer Oreo Pops!
How to Make Santa Oreos
Ingredients you’ll need for this recipe

Step-by-Step Guide
1. Line a large baking sheet with wax paper or parchment paper. This will be the perfect spot to let your Santa Oreos dry and harden after their chocolate bath.
2. In 4 small bowls, melt the white chocolate chips in the microwave. Use 15-second intervals, stirring in between each round to prevent any scorching. Once your chocolate is silky smooth, you’re ready to add the color!
3. In one bowl, add red food coloring to create Santa’s suit.

4. In another, add brown food coloring (or use melted milk chocolate) for the belt.
5. In a third bowl, add a few drops of yellow food coloring for the belt buckle.
6. Leave the fourth bowl of melted white chocolate plain – this will be for Santa’s buttons and detailing.
7. Grab a fork, dip each Oreo into the red-colored chocolate, making sure the entire cookie is covered. Gently tap the fork on the side of the bowl to let any excess chocolate drip off. Place the Oreos onto your prepared baking sheet and let them sit at room temperature or in the fridge until the coating sets.

8. Once the red coating is dry, fill three piping bags with your yellow, brown, and white chocolates.
9. First, use the brown chocolate to pipe on Santa’s belt across the middle of the Oreo.

10. Next, add a tiny square buckle in the center of the belt with the yellow chocolate.

11. Finally, use the white chocolate to create Santa’s buttons – two or three little dots down the front.

12. After decorating, pop your Santa Oreos in the fridge until they’re fully set. Once they’re nice and firm, they’re ready to be enjoyed!
Serve and Enjoy!

Important Recipe Notes
- Melt chocolate in short 15-second bursts in the microwave, stirring each time. This keeps it smooth and prevents burning.
- Use oil-based food coloring when tinting chocolate. Water-based colors can cause the chocolate to seize up.
- If you’re short on time, place the dipped Oreos in the fridge for quicker setting.
- Use piping bags or small zip-top bags with the corner snipped off for easier control when adding Santa’s belt, buckle, and buttons.
- Store in an airtight container at room temperature for up to 3 days, or in the fridge if your kitchen runs warm.
- You can prepare these a day or two in advance to save time before a party.
Chocolate-Dipped Santa Oreo Cookies

Ingredients
- 10-12 strawberry Oreos
- 1 ½ cups white chocolate chips
- Food coloring (red, brown, yellow)
Instructions
- Line a large baking sheet with wax paper or parchment paper. This will be the perfect spot to let your Santa Oreos dry and harden after their chocolate bath.
- In 4 small bowls, melt the white chocolate chips in the microwave. Use 15-second intervals, stirring in between each round to prevent any scorching. Once your chocolate is silky smooth, you’re ready to add the color magic!
- In one bowl, add red food coloring to create Santa’s suit.
- In another, add brown food coloring (or use melted milk chocolate) for the belt.
- In a third bowl, add a few drops of yellow food coloring for the belt buckle.
- Leave the fourth bowl of melted white chocolate plain – this will be for Santa’s buttons and detailing.
- Now for the fun part! Grab a fork, dip each Oreo into the red-colored chocolate, making sure the entire cookie is covered. Gently tap the fork on the side of the bowl to let any excess chocolate drip off. Place the Oreos onto your prepared baking sheet and let them sit at room temperature or in the fridge until the coating sets.
- Once the red coating is dry, fill three piping bags with your yellow, brown, and white chocolates.
- First, use the brown chocolate to pipe on Santa’s belt across the middle of the Oreo.
- Next, add a tiny square buckle in the center of the belt with the yellow chocolate.
- Finally, use the white chocolate to create Santa’s buttons – two or three little dots down the front.
- After decorating, pop your Santa Oreos in the fridge until they’re fully set. Once they’re nice and firm, they’re ready to be enjoyed!
Check Out More Christmas-Themed Recipe Ideas!
Melted Snowman Peanut Butter Cookies